
- 0
- 1,134 word
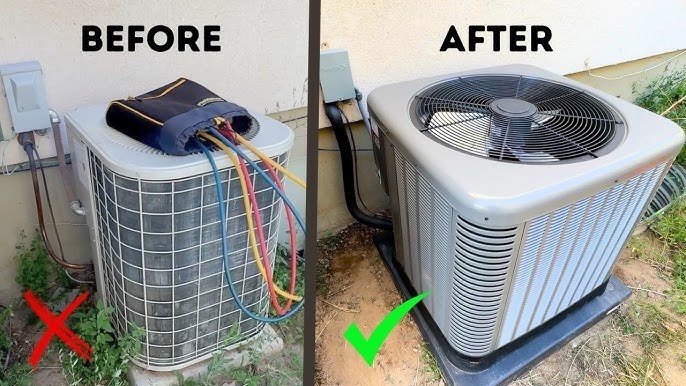
Replacing a central air conditioner is more than swapping a box outside. The equipment, ducts, and controls work as one system, and the quality of each decision shows up later in comfort, humidity control, and energy use. Before installation day, homeowners can make better choices by confirming the correct size, checking the ductwork’s ability to move air, and planning practical details like electrical capacity and condensate drainage. This preparation does not require specialized tools, only the right questions and a clear understanding of what matters. Here is a focused guide to the measurements and decisions that set up a smooth install and a quieter, more consistent home.
- Confirm the Right Size: Load, Ducts, and Return Air
Ask your estimator for a Manual J load calculation and a summary of assumptions, such as window orientation, insulation levels, and air leakage. Do not accept “same tonnage as before” without verification. Oversized systems short cycle and leave humidity behind, while undersized units run constantly and struggle in late afternoon sun. Request a static pressure reading on the existing duct system and note how many square inches of return grilles serve the home. If the ducts cannot deliver the cubic feet per minute the new air handler requires, even a high SEER2 unit will sound loud, cool unevenly, and wear faster. When you begin gathering estimates for air conditioning installation in Rowlett, treat the load number and duct readings as the most important line items on the page.
Two quick house checks help the conversation. First, look for closed off rooms with no dedicated return path; bedrooms that rely only on undercut doors often run hotter. Second, scan the filter slot: note its size and whether a media cabinet could accept a deeper, low resistance filter. Both details affect return airflow and the final system’s noise level and longevity.
- Match Equipment to Climate and Electrical Constraints
Compressor staging changes how an AC feels. Single stage systems are simplest but cycle on and off at full output. Two stage and variable speed systems run longer at low capacity, which can smooth temperatures and improve moisture removal during mild, humid hours. The trade off is upfront cost and, for variable models, more complex electronics. Compare efficiency using SEER2 and, if you heat with electricity, also check HSPF2 for heat pumps. Many homes pair a heat pump with electric heat strips or a gas furnace; your existing flue, gas line, and thermostat wiring, as a C wire may be needed for smart controls, can influence that choice.
Electrical limits can narrow options before you fall in love with a spec sheet. Verify breaker size and available spaces in the panel for the outdoor condenser’s disconnect and the indoor air handler or furnace. Check the existing line set’s diameter and routing; a long, kinked, or concealed line may need replacement to meet manufacturer specs. If the air handler sits in an attic, confirm a reliable 120 volt receptacle for service and plan a safe lighting path. These constraints determine which models fit today without surprise electrical work.
- Inspect the Duct System: Leakage, Insulation, and Balancing
Duct leakage often wastes more cooling than an old condenser. Ask for a leakage test or, at minimum, sealing with mastic at the plenum, takeoffs, and boots where metal meets drywall. In attics, verify insulation wrap on ducts meets current R values and that crushed flex runs are replaced with straight, tensioned lines. Balancing dampers at key branches help fine tune rooms later; marking their positions on install day saves guesswork.
Two scenarios illustrate how ducts shape results. In a one story home with a long hallway, the last bedroom may receive weak airflow because the branch run sags and the supply register is undersized. Replacing that section with properly supported flex and a wider boot can change the room dramatically. In a two story layout, a single small return downstairs can starve the system; adding a jump duct or dedicating returns to closed bedrooms stabilizes pressures so cooled air can reach far rooms without whistling or drafts.
- Plan the Installation Day: Access, Clearances, and Condensate
Crews need clear, safe access. If the air handler is in the attic, provide unobstructed ladder space, clear the pull down stair area, and move cars so the condenser and vacuum pump can be staged nearby. Inside, protect the route from the front door to the equipment closet with a tarp and move fragile items away from supply grilles where registers may be removed. Confirm ceiling height around the air handler allows coil removal, and that the new evaporator coil and drain pan will fit through access openings.
Outdoors, place the condenser on a level pad with open airflow on all sides and overhead clearance for service. Avoid dryer vents and roof downspouts that blow lint or water toward the coil. Plan the condensate path before install day: a primary drain with a visible cleanout, a code compliant trap, and a secondary safety float switch over a pan if the air handler sits above finished space. If gravity will not carry water safely to a drain, a condensate pump with an accessible check valve may be needed. Good drainage prevents the most common post install call: water where it does not belong.
After Startup: Verification, Documentation, and First Month Checks
Commissioning is where quality shows. Ask the technician to record final total external static pressure, supply and return temperatures for a stable delta T, and refrigerant charge validated by manufacturer method, typically superheat or subcooling. Confirm thermostat programming, staging parameters, and dehumidification settings if using variable speed equipment. Request model and serial numbers for the condenser, air handler or furnace, and coil, along with proof that the indoor and outdoor units are a matched set.
Before the crew leaves, write down filter sizes and locations, the recommended MERV rating, and the date for the first change. In the first month, listen for short cycling, confirm the condensate drain is flowing, and feel for balanced airflow at far registers. Register a warranty promptly and schedule the first maintenance visit so coil cleaning, drain flushing, and a quick static pressure check keep the system within spec. These small follow ups protect comfort and document that the installation was done by the book.
Thoughtful preparation turns AC replacement from a rushed equipment swap into a system upgrade. When load numbers drive sizing, ducts are sealed and balanced, and practical details like breaker capacity, condensate routing, and thermostat wiring are squared away, the result is steadier temperatures, quieter operation, and better humidity control. Use the estimate visit to insist on measurements, not guesses. Then organize the workspace, confirm clearances, and plan a quick post install check. A few focused questions before install day pay off for years in comfort you can feel.
Author

linguaezone.com@gmail.com
Related Posts

Modern Commercial Construction Planning for Better Budget Control and Project Success
- 0
- 2,197 words
Commercial construction has entered an era wherein speed, accuracy, and cost control are cautiously connected. Whether a challenge involves an employer workplace,...
Read out all
Integrated Automation Estimating for Industrial Automation and Control Systems
- 0
- 907 words
Industrial automation tasks are becoming more complex as producers adopt smarter management structures, related tools, robotics, sensors, and real-time tracking. With such...
Read out all
Reliable Digital Construction Services That Strengthen Business Performance and ROI
- 0
- 1,149 word
Construction groups are under regular pressure to deliver obligations faster, manage fees, and preserve high-quality standards. At the same time, customers anticipate...
Read out all
Timber Quantity Estimation Tips for Competitive Construction Bids
- 0
- 1,702 word
Winning the construction bid does not really provide approximately the lowest price. Another proposal should balance affordability with practical material costs, labor,...
Read out all
Oceanside AC Breakdowns: Coastal Causes, Early Signs, and Smart First Steps
- 0
- 1,153 word
Living by the beach is great until the first heat wave hits and the air conditioner starts acting up. Oceanside’s salt air,...
Read out all
AI or Professional Translation? Choosing the Right Approach for Malay
- 0
- 936 words
A single word can reveal where someone comes from. In a Malay news feature, a speaker used pitih, a regional term for...
Read out all